Overview : SharePoint 2013 Search
SharePoint 2013 contains a Single Extensible Search Platform. This search engine is used by both SharePoint 2013 and Exchange 2013 and comprises of:
- FAST Search Engine
- SharePoint Content Crawler
Note: Fast Search & Transfer ASA (FAST) was a Norwegian company that focused on data search technologies. On April 24, 2008, Microsoft acquired FAST and in SharePoint 2010 sold the FAST search product as a separate product add-on to the SharePoint search engine. In SharePoint 2013, the FAST search technology has been included as the sole search engine.
FAST Search has great strengths in Scale and Extensibility. It is complex to deploy and maintenance is expensive.
The Search Architecture is shown below.
More details can be found at http://technet.microsoft.com/en-us/sharepoint/fp123594.aspx
Step 1. Create the Search Service Application.
- Note: If an instance of the Search Service Application has been created with the Farm Configuration Wizard, skip this step and move onto Step 2.
- Log onto the SharePoint Server with Farm Administration credentials and open Central Administration.
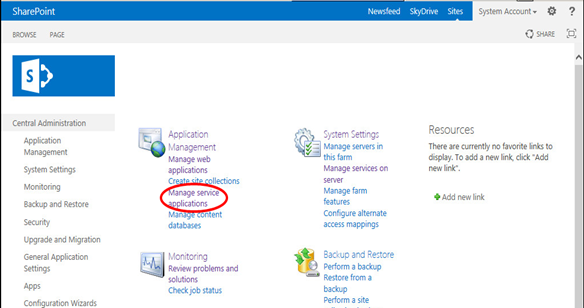
- Click the Manage Service Applications link to navigate to the Manage Service Applications Page
- Click the Drop down on the New item on the ribbon and select Search Service Application
- Fill out the form with data to create the Search Service Application
- Name and account
- Application Pool for Search Admin Web Service (use same settings for Application Pool for Search Query and Site Settings Web Service)

- Leave all the other settings with default values and click OK to create the new Search Service Application. Once the service application has been created, SharePoint will display the success message below. Click on OK to be returned to the Manage Service Applications page.

- There should be a new instance of Search Service Application listed along with the other service applications. Select the Search Service Application and click the Manage button on the ribbon to open the home page of the search administration site.
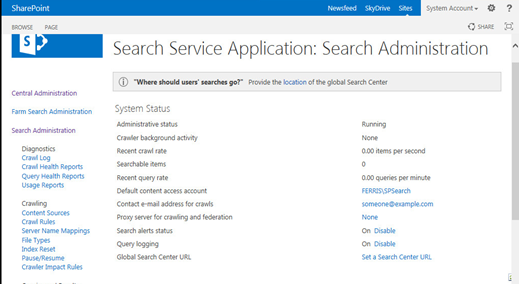
- Scroll down further to verify that the SQL server is running the four databases associated with the Search Service Application:
- Administration Database
- Analytics Reporting Databas
- Crawl Database
- Link Database.
Step 2. Configuring Search Service Application.
- Configure the identity of the Search Service Application Crawl Account
- Open the administration page of the Search Service Application – [If the administration page shown in Step 7 of the previous section has been closed, it can be reopened by Central Administration –> Manage Service Applications –> Search Service Application]
- Change the Default Content Access Account to the crawler account. [Note: It should be different from the SPSearch account since it performs a different function]

- Click OK to return to the Search Administration Page
- Provide the Crawler account with access to the User Profile Service Application
- Highlight the User Profile Application Service [Central Administration –> Manage Service Applications –> User Profile Service Application] and click the Administrators button on the ribbon
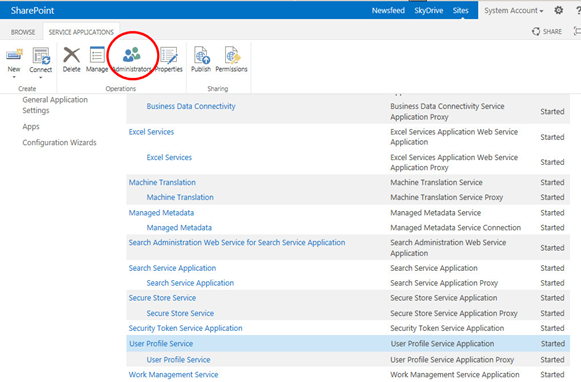
- In the test box enter the crawler account [in this case FERRIS\SPCrawler], click ADD, select the check box next to “Retrieve People Data for Search Crawlers” and Click OK.
- Return to the main Search Administration page of the Search Service Application and click the Content Sources Link in the Crawling Section of Quick Launch

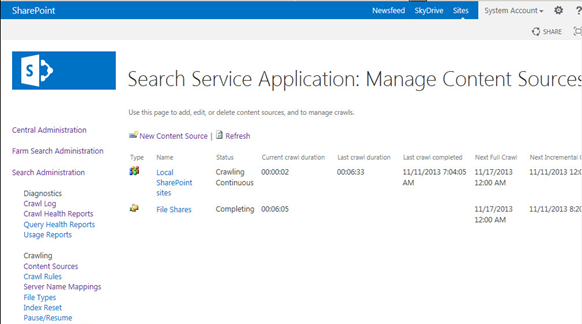
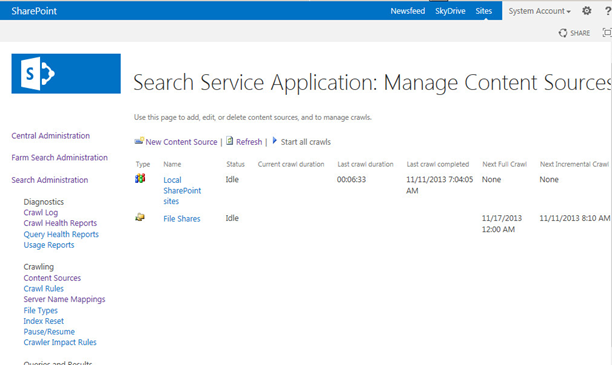
- The Manage Content Sources page will open displaying a single content source called Local SharePoint Sites. Click the drop down arrow on the Local SharePoint Sites and select Start Full Crawl

- If the windows is refreshed some statistics are displayed. If the crawl is still currently running, the Current Crawl Duration time will also be shown. (In the picture below there is an additional Crawl Source shown. Instructions on setting this up are included further down this document).
- Highlight the User Profile Application Service [Central Administration –> Manage Service Applications –> User Profile Service Application] and click the Administrators button on the ribbon
- Setting up the Crawl Schedule. Clicking on the Content Source brings up the Edit Content Source window. Scrolling down in this window will show the crawling settings and schedules which can be modified according to the Farm requirements. In this case a Full crawl is started every Sunday and Continuous incremental crawls are run.

- Adding additional content sources. Additional content sources can be added for crawling, Below is an example of adding a file share that is stored on a file server in the domain. (So long as information and documents can be accessed and read, the source can be added). In the Manage Content Sources Window click on the New Content Source button

- Create a New Content Source : add a name, select a type and enter the start address.

- Scroll down the page and configure the Crawl Settings, Crawl Schedules and Content Source Priority. The Incremental Crawl schedule will be shown. Select Create Schedule.

- The settings below have been selected. They can be customized depending on the farm. When satisfied with the settings click OK

- The settings show up on the Add Content Source Screen. Click OK

- On the Manage Content Sources the new Content Source that has been added can be seen. A full crawl of this source can be started if desired by clicking on it and clicking the drop down list and starting the crawl as was shown before. The option “Start all crawls” can also be selected. Use discretion if this option is chosen because if there are many crawl sources the server may slow down drastically as all the content sources are crawled.
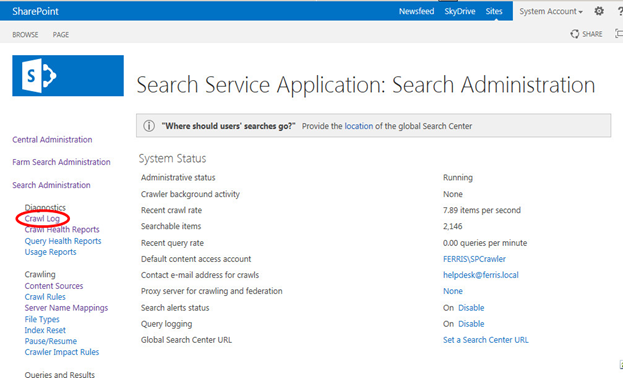
- Crawl Logs: To view the crawl log, click on Crawl Log in the Search Service Application quick launch toolbar
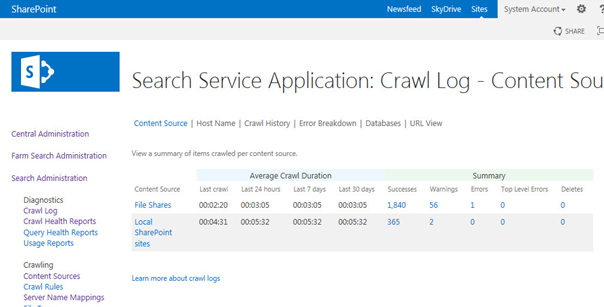
- The crawl log displaying statistics will be displayed and any errors can be checked.
This concludes the instructions on how to configure search in SharePoint. I am interested in getting any feedback based on search – ease of setup, time taken to process items, anything else search related.
